Author Archives: vlm
Why Bathroom Remodel Costs What They Do?
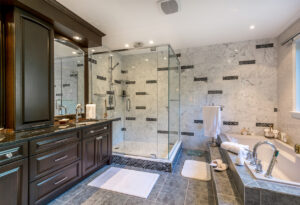
An honest breakdown of our bathroom remodel costs, what goes into the price — and why every dollar is earned. If you’ve ever gotten a bathroom remodel estimate and felt a little surprised, you’re not alone. The number can seem large until you understand what’s actually behind it. Here’s a transparent look at the factors that shape the cost of a quality bathroom renovation.
1.) Design complexity
Custom layouts, intricate tile patterns, and one-of-a-kind fixtures require careful planning and specialized craftsmanship. Unlike a paint refresh or a simple flooring swap, a thoughtfully designed bathroom demands more time and a higher level of expertise — and that’s reflected in the budget.
2.) Multiple Skilled Trades
A bathroom remodel isn’t a one-trade job. It takes a coordinated team: tile setters for precision work, plumbers for pipes and fixtures, and electricians for lighting and wiring. Proper waterproofing alone is non-negotiable — which is why we rely on the Schluter system, a trusted method proven to protect against leaks for the long haul.
3.) Project Timeline
Time is one of the most direct cost drivers. A smaller, straightforward bathroom might be finished in around two weeks. A larger, more complex project — like a spa-inspired master bath — can run six to eight weeks. Every additional week means more labor, more coordination, and a greater overall investment.
4.) Fixture Quality
The fixtures you choose matter far more than most people expect. We deliberately avoid cheap, mass-produced options that look dated quickly or fail under daily use. Instead, we specify from trusted brands like MOEN, DELTA, GROHE and SIGNATURE HARWARE which known for both craftsmanship and longevity.
5.) Bathroom Remodel Costs of Labor in New Jersey
Labor is one of the most significant line items — particularly here in New Jersey, where the cost of living runs high. We believe in paying our craftspeople fairly. That’s not charity; it’s strategy. A well-compensated team is a committed team, and consistent quality is the result.
6.) Logistics & Home Protection
Bathrooms are often on the second floor of a fully finished home — which makes material delivery more involved than it sounds. Getting supplies upstairs without damaging walls, railings, or flooring takes extra time, extra hands, and careful planning. Protecting your home throughout the process isn’t optional; it’s part of the job.
Every element of a bathroom remodel connects to the next. When done right, the result is a space that holds up beautifully for years — and the investment makes sense. Have questions about what your project might involve? We’re happy to walk you through it. Follow us on Facebook to keep up to date with our most recent projects & specials.
Aging in Place Remodeling in South Jersey
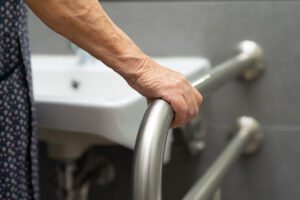
What Is Aging in Place Remodeling?
- Safer, more accessible bathrooms
- First-floor living solutions
- Finished basements for family or caregivers
- Improved lighting and layout
Cost of Aging in Place Remodeling in South Jersey
- Bathroom remodel (aging-in-place focused): $10,000 – $60,000
- First-floor bedroom + bathroom conversion: $30,000 – $100,000
- Basement remodel with full bathroom: $60,000 – $100,000+
Most Important Upgrades to Consider:
- Walk-in or zero-threshold showers
- Built-in benches
- Slip-resistant flooring
- Grab bars that match the design
- Dining rooms
- Offices
- Formal living spaces Into functional bedrooms with nearby bathrooms.
- Finishing Basements for caretakers.
- In-Law Suite Additions
Basement Remodeling: A Smart Solution in South Jersey Homes
- Create space for a caregiver or family member
- Add a bedroom and full bathroom
- Provide privacy while keeping loved ones close
How to Keep Your Basement Warm in Winter (South Jersey Basement Finishing Guide)
If you’re planning a basement finishing project in South Jersey, one of the biggest concerns is simple: Will it actually feel warm in the winter?
A poorly finished basement stays cold, no matter how nice it looks. But when it’s built correctly, your basement can feel just as comfortable as the rest of your home—even in the middle of January.
Here’s how to do it right.
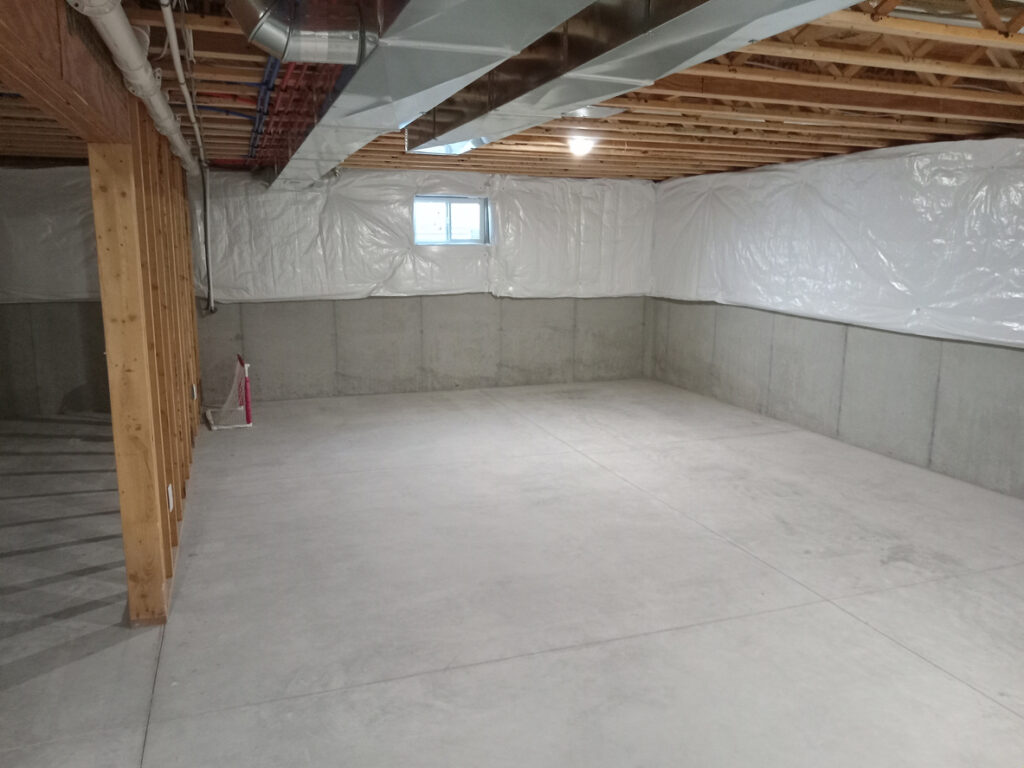
1. Use the Right Basement Insulation in the Proper Application
The biggest mistake homeowners make is using fiberglass insulation against foundation walls.
Concrete holds cold—and fiberglass doesn’t stop it.
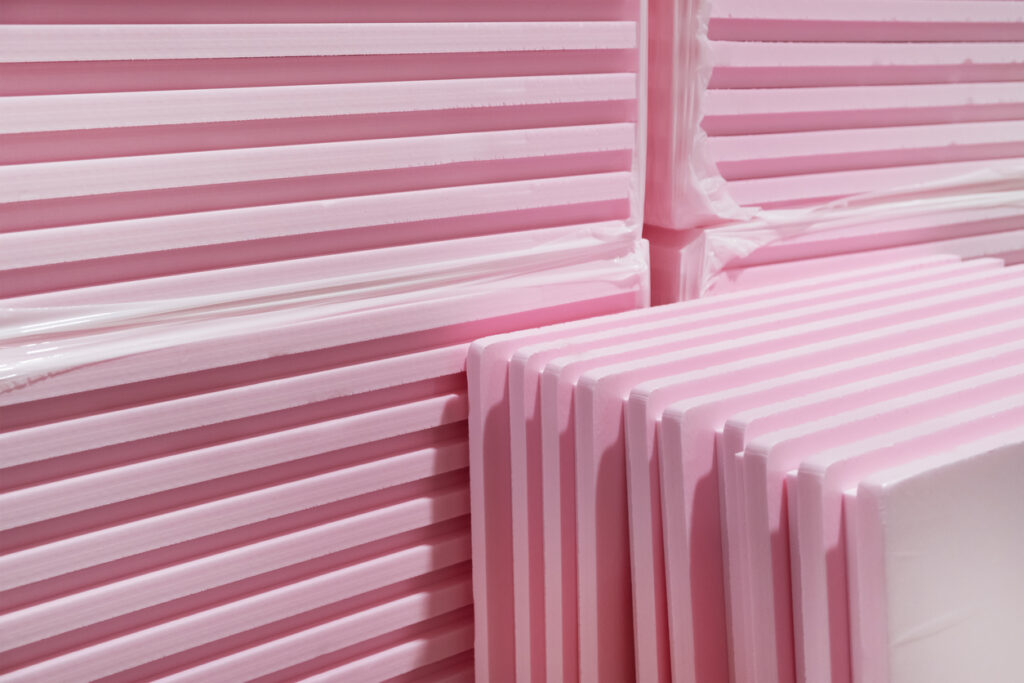
For a warm basement, you need:
• Rigid foam board insulation (XPS or EPS) against the foundation
• Or closed-cell spray foam insulation
These create a thermal barrier that keeps cold from transferring into your space. Then you can use batt insulation only after that thermal barrier is in place.
This is the foundation of any warm basement in New Jersey.
2. Air Seal the Basement Before Finishing
Even a well-insulated basement will feel cold if air is leaking in.
Before drywall goes up:
• Seal rim joists
• Seal around pipes, wiring, and penetrations
• Address small foundation cracks
These small steps improve comfort immediately and reduces heating costs. Feel free to do these at anytime before a planned remodel!
3. Insulate the Rim Joist (Critical Step)
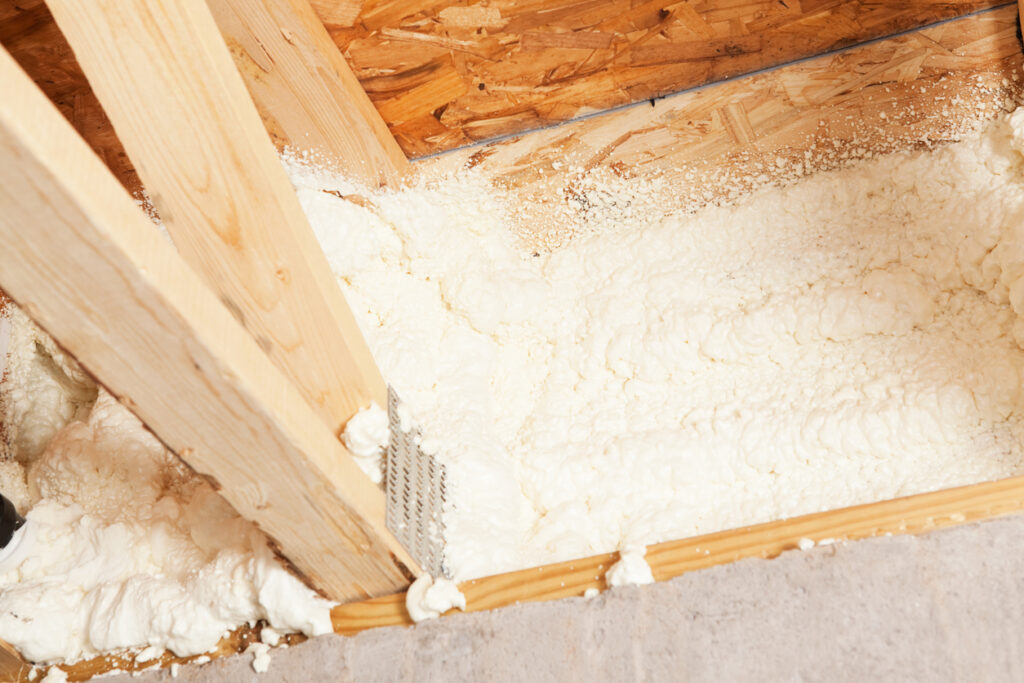
The rim joist is one of the biggest sources of heat loss in a basement.
Best options:
• Closed-cell spray foam
• Rigid foam cut and sealed in place
Skip this, and your basement will always feel drafty.
4. Install a Subfloor to Warm Up the Floor
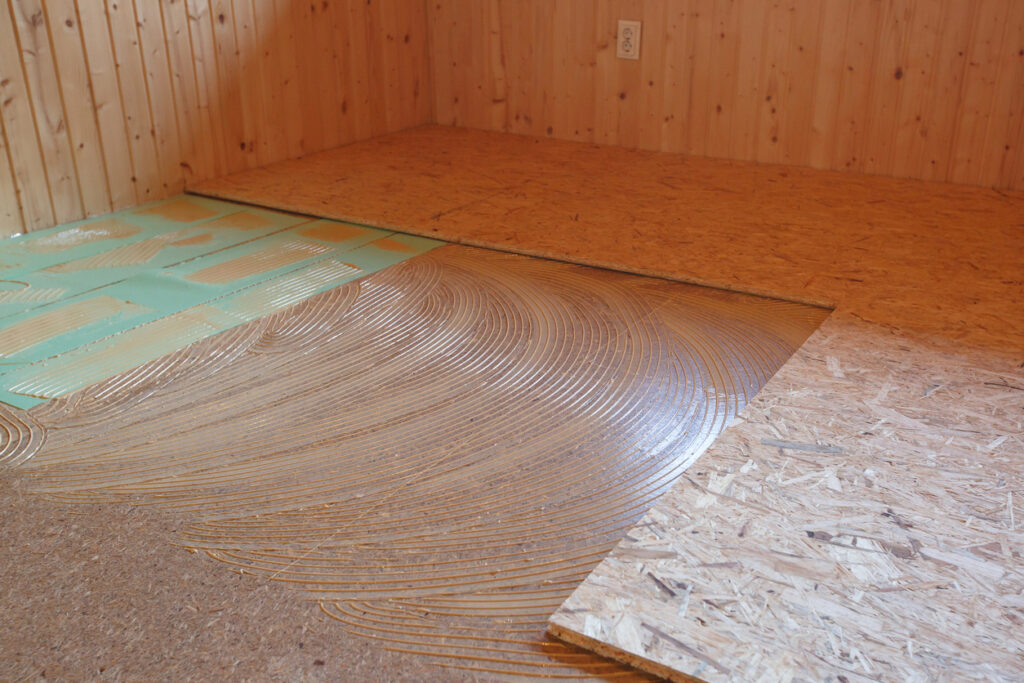
Cold floors = uncomfortable basement.
Instead of installing flooring directly on concrete:
• Use a basement subfloor system (like DRIcore)
• Or install a thermal break underlayment
This keeps floors warmer and makes a huge difference in overall comfort. This is not something we do often but for those clients where comfort is top of their list, we would recommend it.
5. Make Sure Your Heating System Is Sized Properly
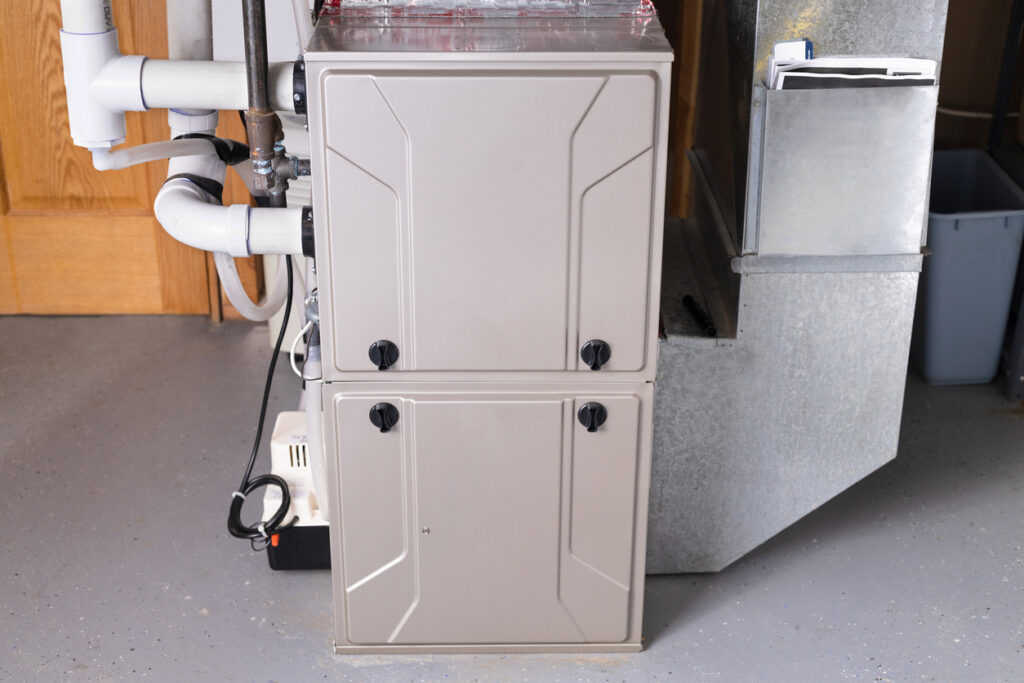
Many basements feel cold because they’re an afterthought in the HVAC design.
Your options:
• Extend your forced air system (properly designed—not just adding a vent)
• Install a ductless mini-split system
• Add electric baseboard or radiant heat
• Add a gas or electric fireplace to your remodel
Proper heating design is just as important as insulation.
6. Control Basement Humidity
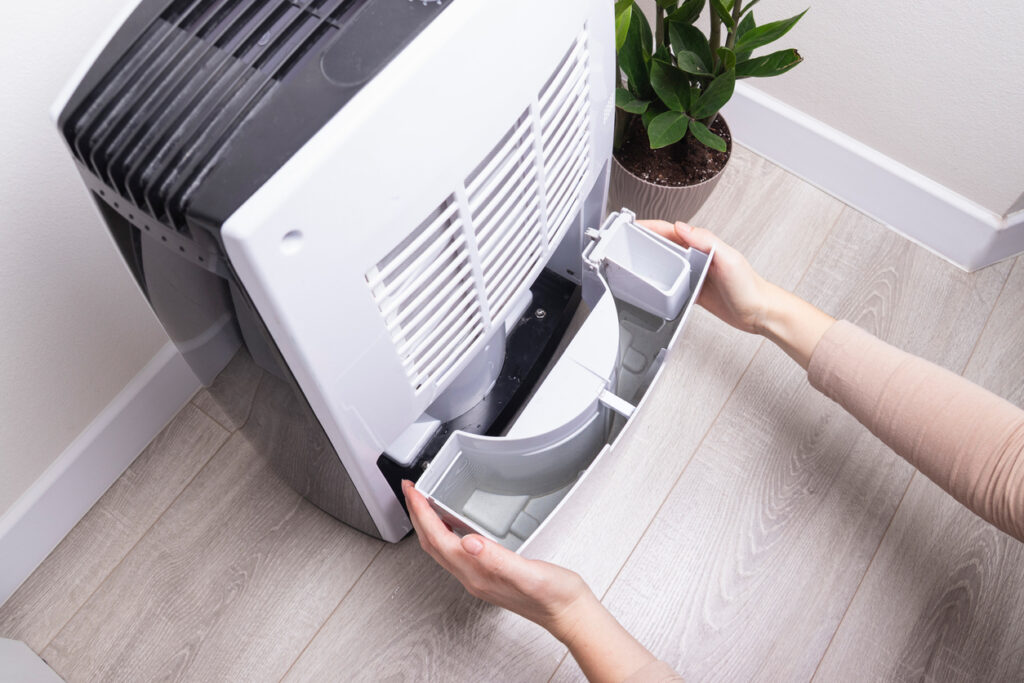
A damp basement always feels colder than it actually is.
To fix that:
• Install a dehumidifier
• Ensure proper air circulation and returns
Dry air feels warmer—and more comfortable.
7. Upgrade Basement Windows and Seal Them
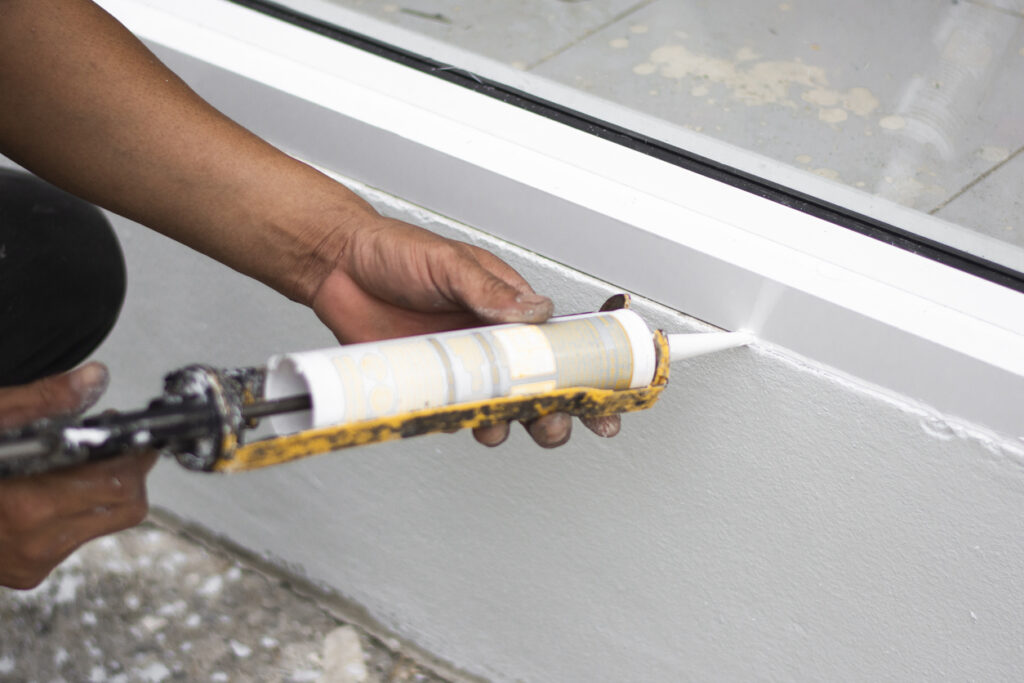
Older basement windows can let in a surprising amount of cold air.
Consider:
• Energy-efficient replacement windows
• Proper sealing and insulation around frames
This is a small upgrade with a noticeable impact and is often overlooked.
Why Basement Finishing Matters in South Jersey
In South Jersey, winters aren’t extreme—but basements still get cold due to:
• Below-grade construction
• Moisture in the soil
• Poor insulation in older homes
That’s why proper basement finishing isn’t just about looks—it’s about comfort and efficiency.
The Bottom Line
If you want a warm basement in winter:
Insulate it correctly, seal it tightly, and design the heating system properly.
Do those three things right, and your basement won’t feel like a basement anymore.
Basement Finishing in South Jersey
At Ideal Remodeling, we specialize in basement finishing in South Jersey, building spaces that are warm, dry, and built to last.
If you’re thinking about finishing your basement, we can help you do it right the first time.
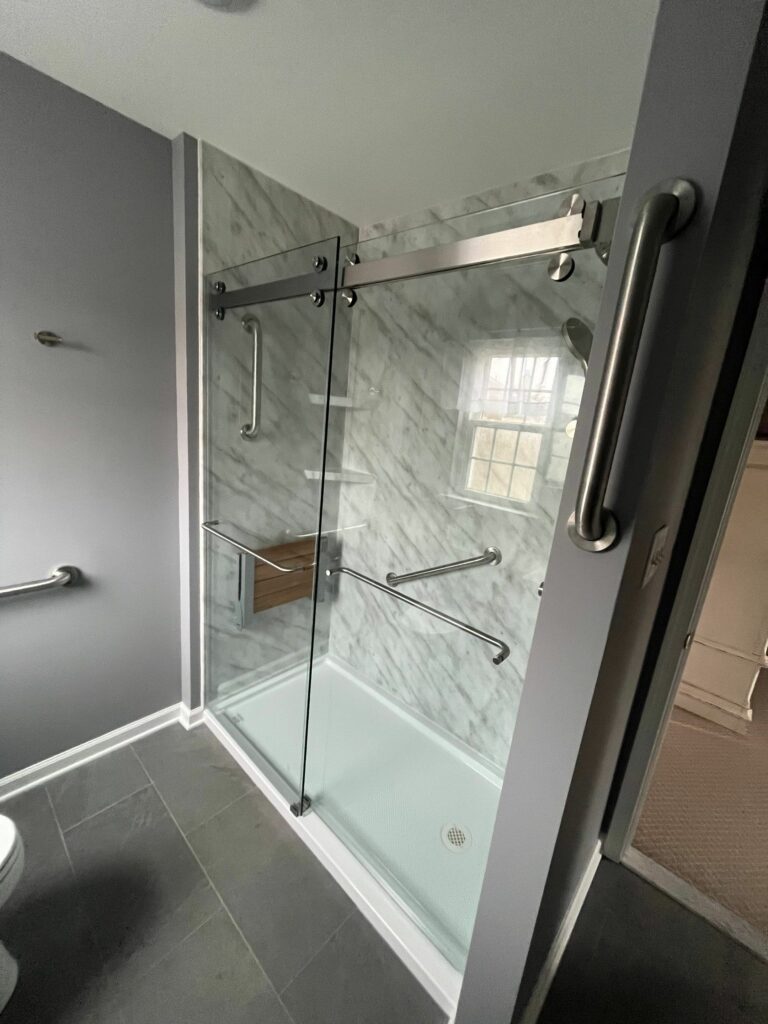
One-Day Showers Are Appealing—but Not Always Feasible
One-day showers are incredibly appealing. After all, who wouldn’t want a beautiful new shower installed without days or weeks of disruption? Contractors come in, and by the end of the day, your space feels refreshed. But here at Ideal Remodeling, we believe in transparency: while some companies can offer a one-day turnaround, our process takes a bit more care, and that’s why we don’t advertise one-day showers. We want to set realistic expectations so you get a shower you’ll love for years to come.
One-Day Showers, Two-Day Showers or 7 Days Showers are less important than WELL BUILT SHOWERS!
Step-by-Step: What Goes Into a Quality Shower Installation
1. Careful Demo Prep: We start by meticulously demoing the existing shower to avoid extra repair work later. That way, once the new shower is in, there’s very little left to do—maybe just a touch of paint.
2. Plumbing Prep: Next, we address the plumbing. Unless your current shower diverter is brand new, we’ll recommend replacing it and running a new line up to the shower head. We also add blocking for grab bars—whether now or in the future—so you have that added safety.
3. Shower Pan Installation: With our crylic shower walls we also use acrylic shower pans, and the trick is to cement them down to the subfloor. Once it’s set at the proper level, we let it cures before we walk on it and start adding the walls.
4. Substrate Selection: Behind the acrylic walls, we have options. You can use green board, which is moisture-resistant, but we prefer plywood. That way, anything attached—like a future grab bar that may have not been planned still has a solid anchor. Then, we prep the surface, glue on the acrylic, and seal all the corners with silicone.
5. Shower Door: After the shower is fully installed, we measure for a custom shower door through a professional shower door company. That usually takes about 10 days, but once it arrives, installation only takes a few hours. In the meantime, you’ll have a functional, gorgeous shower with a temporary curtain. This may seem like an inconvenience to wait for but the quality of the shower door is far above that which is just off the shelf.
How Much Does a One-Day Shower Cost?
On average, our Bellastone Acrylic shower remodel ranges between $9,000 and $12,000. Of course, every project is unique—your exact cost depends on the scope of demo, whether you add a shower door, and your custom measurements.
Check out the full range of Bellastone products at bellastonesystems.com. As an authorized distributor, we handle all Bellastone orders. Just choose your style, contact us directly, and we’ll guide you through the next steps.
Ready to talk about your new shower? Give us a call! (856) 939-1069
Do You Need Permits for a Basement Remodel in New Jersey?
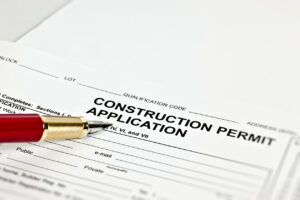
If you’re planning a basement remodel in South Jersey, one of the most common questions homeowners ask is: “Do I really need permits?” The short answer is yes — in most cases, you do. Skipping permits might seem like a way to save time or money, but it often ends up costing far more in the long run.
Here’s what homeowners should know before starting a basement renovation in New Jersey.
When Are Permits Required for a Basement Remodel?
In New Jersey, permits are required anytime your basement remodel involves building walls, adding electric, plumbing or mechanical systems. This includes most finished basement projects.
You will typically need permits if your project includes:
- Framing walls or altering the layout
- Electrical work (outlets, lighting, panel upgrades)
- Plumbing (bathrooms, wet bars, utility sinks)
- HVAC work (adding vents, returns, or baseboard heat)
- Finishing an unfinished basement into livable space
Even if the basement already exists, finishing it legally changes the use of the space, which triggers permit requirements.
Types of Permits Needed for a Basement Remodel in NJ

Most basement remodels require a combination of the following permits:
Building Permit: A building permit covers framing, insulation, drywall, stairs, ceiling height compliance, and egress requirements. This inspection also includes firestopping of all vertical penetrations for electrical, plumbing and any other gaps where fire can travel. That is why plumbing and electrical inspections are completed prior to rough framing inspection. This ensures the basement meets current building and safety codes.
Electrical Permit: Required for new outlets, lighting, smoke detectors, GFCI/AFCI protection, and any panel or circuit changes.
Plumbing Permit: Needed if you’re adding a bathroom, shower, sink, or wet bar. Basement plumbing is closely inspected due to drainage, venting, and sump considerations.
Fire or Safety Inspections: Some New Jersey townships also require fire inspections, especially when adding bedrooms, egress windows, or smoke and carbon monoxide detectors.
The Inspection Process (What Homeowners Don’t Always See)
Permits aren’t just paperwork they come with inspections that protect you! Most basement remodels include rough inspections (before drywall) and final inspections (after all work is completed.) Inspectors will check electrical safety, plumbing connections, framing, fire blocking, and proper egress. Once approved, your basement is officially recognized as legal living space.
What Happens If You Don’t Get Permits?
Skipping permits can cause serious problems later, even if everything “looks fine.”
Common consequences include:
- Stop-work orders once unpermitted work is discovered
- Fines that can exceed the cost of the original permits
- Being forced to open walls so inspectors can see hidden work
- Problems during a home sale, when inspections or appraisals flag the basement as illegal
- Reduced home value or difficulty securing financing
In many cases, homeowners end up paying twice — once to fix the problem and again to legalize the work.
Can a Contractor Pull Permits for You?
Yes, and they should. A licensed, reputable contractor will handle:
- Permit applications
- Scheduling inspections
- Coordinating with local building departments
If a contractor suggests skipping permits, that’s usually a red flag.
Final Thoughts
A basement remodel is one of the best ways to add usable space and value to your home — but only if it’s done correctly and legally. Permits may feel like a hassle upfront, but they protect your investment, your safety, and your home’s future resale value. If you’re considering finishing your basement in South Jersey and want to make sure everything is done the right way, working with an experienced contractor who understands local permit requirements makes all the difference.
Contact Ideal Remodeling today to schedule a consultation and make sure your basement remodel is done right from the start. Simply click on the “get started” button and we’ll be in touch.
Basement Remodeling in South Jersey: What Homeowners Should Know
Basement remodeling or finishing a basement is one of the smartest ways to add usable space to your home without building an addition. In South Jersey, basements are common, and most of them are under-used. A well-planned remodel can turn that space into a living area, a gym, a home office, a guest suite, or a combination of all of them.
At Ideal Remodeling, we’ve seen basement projects give families more room to spread out while also increasing resale value. It’s a cost-effective project compared to building out or up, and it uses space you already own.
Why Remodeling a Basement Makes Sense
Home additions usually require zoning, foundation work, and heavy structural changes. Basements don’t. That’s why remodeling a basement is typically faster, cleaner, and far more affordable than adding square footage onto the house.
Homeowners also like that basement remodels are flexible. You can design a layout that fits your family—an open entertaining space, a bar area, a bathroom, a bonus room, or storage.
What Basement Remodels in South Jersey Cost
Because every basement is different, costs vary based on layout, plumbing, electrical, and finishes. But most finished basements in South Jersey fall into a general range:
- Basic finishes: starts around $50,000–$60,000
- Mid-level finishes: $60,000–$90,000
- High-end basements with bathrooms, bars, or multiple rooms: $90,000–$150,000+
- The biggest cost factors are:
- Adding a bathroom or wet bar
- Custom carpentry like custom trimmed walls or built-ins
- Upgraded flooring, lighting, and sound systems
- Framing multiple rooms instead of one open space
- Finished wood staircases with railings & balusters
- Egress windows or doors (a must if adding a bedroom)
If you want the most value for your investment, keep the layout simple and choose finishes that balance durability and style.
Popular Basement Design Trends for 2025
Homeowners in South Jersey are leaning toward a clean, comfortable look that still feels like part of the main home. Some trends we’re seeing include:
- Accent walls using shiplap or vertical trim
- Bar areas with quartz countertops and cabinetry
- Electric or gas fireplaces surrounded by tile or wood accents
- Floating shelves that add storage without clutter
- Luxury vinyl plank flooring for durability
- Neutral paint colors like grays, tans, and warm whites
- Well placed LED recessed lighting and wall sconces
Many families are also adding a gym or office, which has become one of the most requested bonus spaces. How about an Art Room for kids?
Choosing a Basement Remodeling Contractor You Trust
Basement remodeling involves framing, electrical, plumbing, waterproofing, and finish work — so choosing a contractor with experience is important. At Ideal Remodeling, basements are one of our specialties, and we handle everything from design & layout ideas, permits to the final walkthrough.
If you’re thinking about updating your basement, we can help you plan a design that fits your lifestyle!
The Cost to Add a Bathroom to a Finished Basement in South Jersey

Adding a bathroom to your finished basement is one of the most valuable upgrades you can make to your home. Whether the basement is used for entertaining, a guest space, a gym, or a playroom, a bathroom adds convenience and increases your home’s resale value.
Most basement bathrooms fall into two main categories:
- • Powder Room (toilet + vanity)
- • Full Bathroom (toilet + vanity + shower)
Below is a clean breakdown of both options, what’s included, and typical costs in South Jersey to add in a bathroom within a basement remodel
Basement Bathroom Cost Overview
Powder Room ($12,000 – $18,000)
- Toilet, vanity, lighting, exhaust fan, flooring, basic finishes
Full Bath – Fiberglass Shower ($20,000 – $25,000)
- All powder room items + fiberglass shower
Full Bath – Tiled Shower ($30,000 – $40,000+)
- All powder room items + custom tiled shower, waterproofing, glass
Powder Room (Half Bath)
Best for Basements Used As:
- Entertainment areas
- Bar or lounge spaces
- Media rooms
- Home gyms
- Kids’ hangout areas
Typical Cost: $12,000 – $18,000
Why It’s the Most Affordable Option:
- No shower = minimal waterproofing
- Smaller footprint
- Faster installation
- Fewer plumbing requirements
A powder room keeps guests from running upstairs and provides a big convenience boost without the cost of a full bathroom.
Full Bathroom (With Shower)
A full bathroom makes the basement feel like a true extension of the home. This is the best choice if you plan to host overnight guests or include a bedroom in the basement.
Option 1: Fiberglass Shower Insert= $20,000 – $25,000
Benefits:
- More budget-friendly
- Faster to install
- Low maintenance
- Great performance for long-term use
Option 2: Fully Tiled Shower=$30,000 – $40,000+
Why It Costs More:
- Tile installation
- Schluter waterproofing
- Optional niches or benches
- Decorative tiles and mosaics
- Custom glass door
A tiled shower gives the basement bathroom a “main floor” feel and offers the best look and resale appeal.
What Can Affect the Price?
✔ Plumbing Location or Septic
If existing plumbing can be tied into, costs stay lower. If new drains must be added, the concrete floor may need to be opened. If a septic is present and can handle the new bathroom.
✔ Sewage Ejector Pump
Most homes require a pump to move waste to the main sewer line.
✔ Ventilation
Basement bathrooms require a dedicated exhaust fan.
✔ Finish Selections
Tile style, vanity quality, glass doors, fixtures, and lighting all influence the final price.
Before & After Photos
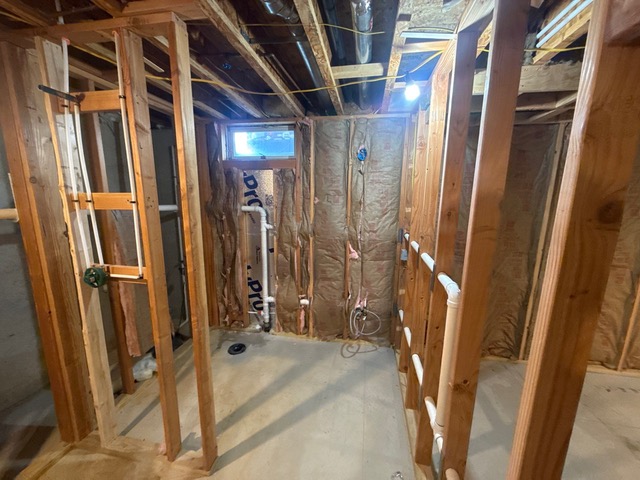
Unfinished basement area with roughed plumbing or bare concrete.
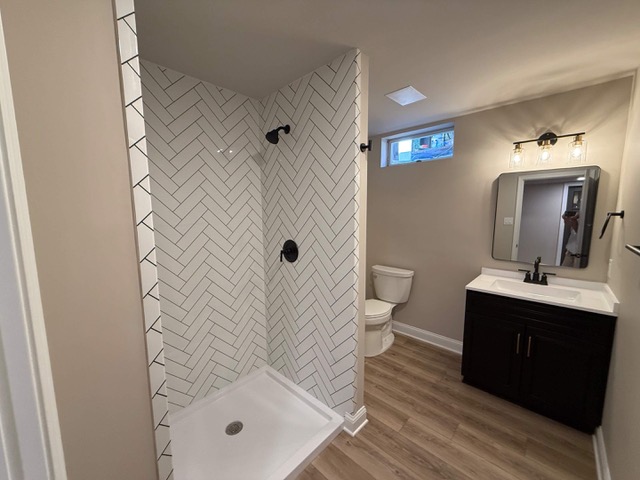
A fully completed powder room or full bathroom with stylish finishes, clean lighting, and matching basement décor.
Is Adding a Basement Bathroom Worth It?
For most South Jersey homeowners — yes.
A basement bathroom significantly increases usability and helps future resale, especially when paired with a bedroom or entertainment area.
Considering a Basement Bathroom?
Ideal Remodeling specializes in basement projects across Blackwood, Sewell, Swedesboro, Mullica Hill, Cherry Hill, Voorhees, Mt. Laurel, Medford, Mount Royal, Deptford, and the surrounding South Jersey area. Whether you want a simple finished area for the kids to hang out, a fully functioning in-law space or the man cave that your buddies can’t wait to watch the game at, we can design and build a space that suits you!
How Much Does a Basement Remodel Cost in South Jersey?
“How much does a basement remodel cost in South Jersey?” Is the first crucial question every homeowner asks us at Ideal Remodeling, where we’ve had the privilege of completing many finished basements across the region. If you’ve been thinking about transforming your unfinished basement into a functional living space for entertaining, working, or relaxing, you’re not just adding square footage—you’re fundamentally changing how you use and enjoy your home.
If you’ve been thinking about transforming your unfinished basement into a functional living space, you’re not alone. Basement remodels are one of the most cost-effective ways to add square footage to your home without building an addition — and they can completely change how you use your home.
Average Basement Remodel Cost in South Jersey
In South Jersey, a typical 1000-1200 sq.ft. basement remodel ranges from about $65,000 for a very basic rec. area to $150,000 for a basement with a bathroom and wet bar. Price is dependent on the over all size, layout, and finishes.
So What Affects A Basement Remodel Cost in South Jersey?
1. Size and Layout
The larger the space, the more materials, flooring, drywall, and lighting you’ll need. Open layouts generally cost less per square foot than basements divided into multiple rooms.
2. Bathrooms
Adding a simple powder room can add around $15,000. Full 3 piece bathrooms will start at around $25,000 and go up from there. Larger bathrooms with soaking tubs, custom tile showers, double bowl sinks and upgraded fixtures can bring costs up significantly. Expect $50,000 plus for the larger bathroom.
3. Bar or Kitchenette
A wet bar or kitchenette adds both style and functionality, but it also involves plumbing, electrical, cabinetry, and countertops, typically an additional $10,000 to $30,000. While larger bars/kitchenettes with upgraded appliances, ice-makers and custom features will exceed those costs.
4. Flooring and Finishes
Luxury vinyl plank (LVP) flooring is one of the most popular basement options because it’s durable and water-resistant. Carpet in a TV or game areas adds warmth and comfort. Your choice of finishes has a big impact on overall price. LVP is not only more expensive but can require more floor prep for a proper installation.
5. Lighting and Electrical Work
Recessed lighting, sconces, and feature lighting like accent walls or fireplace areas can add visual appeal and enhance the finished look. Let’s not forget to make sure your electrical panel has the space for all of this new electric. Sub panels are required more times than not.
6. Custom Features
Many homeowners are adding shiplap or trimmed accent walls, electric fireplaces, built-in shelving, or soundproofing for media rooms — each adding unique character and value to the basement.
7. Egress Windows
If the space is being used as a bedroom then an egress window will be required. If it is just a recreation space it is not required but recommended. This can increase the cost from 10-20k depending on the method used.
Why Finish Your Basement Instead of Building an Addition?
Finishing your basement is one of the best investments you can make in your home. Typically a basement remodel cost in South Jersey is about 40–50% less than building an addition, and it adds valuable living space without changing your home’s footprint. It’s also a great way to increase resale value, a well-finished basement can provide an immediate return of 70–75% on investment, according to industry averages. Plus once it’s completed there aren’t thousands in landscaping costs to be completed. An expense that is many times overlooked when building an addition.
Start Your Basement Remodel with Ideal Remodeling
Whether you want a family-friendly hangout, a home gym, an entertainment zone with a bar, or a guest suite, Ideal Remodeling can help you design and build a space that fits your needs and budget.
We handle every part of the process, from design and permitting to framing, electrical, plumbing, and finishing touches. Our team is based right here in South Jersey, and we take pride in turning basements into beautiful extensions of your home.
Ready to get started?
Contact Ideal Remodeling today to schedule your basement consultation and discover what’s possible beneath your home.
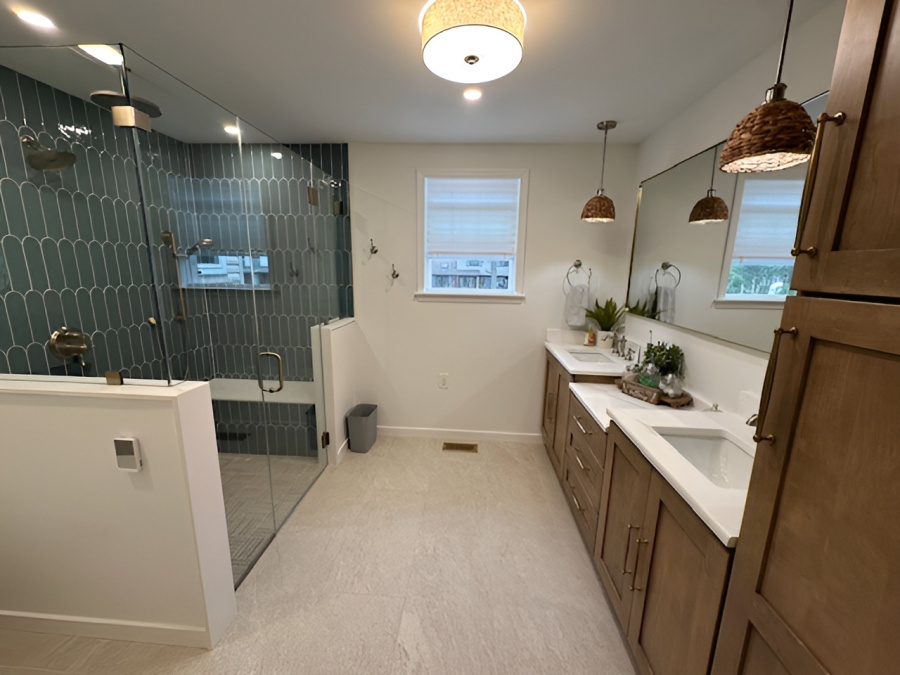
Bathroom Remodel in Runnemede, NJ
Our team at Ideal Remodeling is proud to share the details of a recent bathroom remodel in Runnemede, NJ where we transformed a dated space into a stylish and functional retreat. This project was all about rethinking the layout to better suit the homeowner’s needs and aesthetic goals, creating a room that is both beautiful and highly practical.
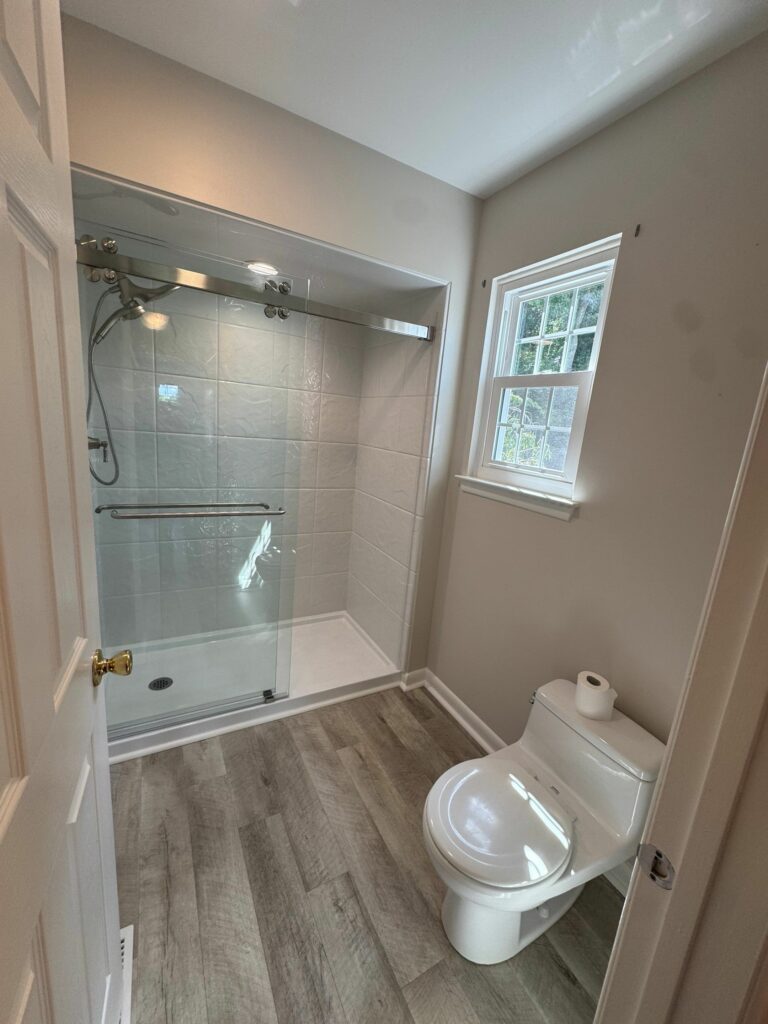
Opening Up the Space
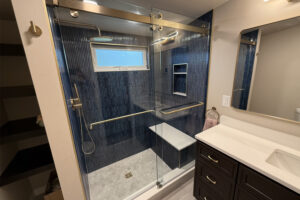
The most significant change we made was relocating the shower. By moving it to the opposite wall, we immediately opened up the bathroom, creating a more spacious feel. To enhance the new shower area, we installed a higher-set window. This smart addition brings in plenty of natural light while maintaining complete privacy, striking a perfect balance for the room. This strategic planning is what sets our approach to a bathroom remodel apart.
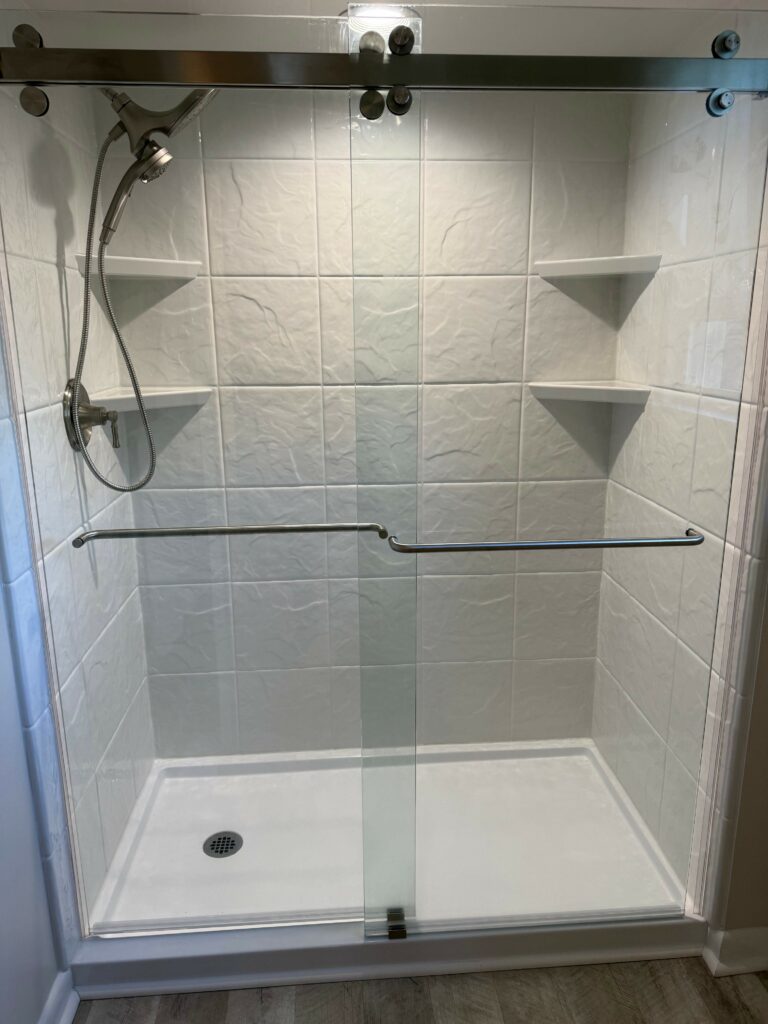
Custom Features in this Bathroom Remodel in Runnemede, NJ
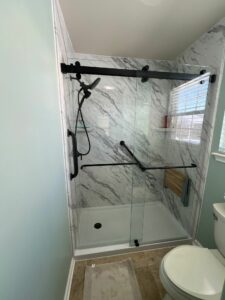
The new shower is the centerpiece of the room. We used a deep blue custom tile that runs from floor to ceiling, creating a dramatic effect. This is complemented by brushed gold fixtures, a built in bench for comfort, and a storage niche. A custom glass sliding door system encloses the space. To add a layer of luxury, we installed a Schluter heated tile system under the floor. This feature ensures the bathroom is warm and comfortable, especially during our cold South Jersey winters.
Maximizing Floor Space and Style Of The Bathroom Remodel in Runnemede, NJ
To further improve the floor plan, we replaced the old swing door with a pocket door. This simple change freed up valuable floor area that was previously unusable. We installed a new vanity that features a clean quartz countertop and an undermount sink. The rich cabinetry pairs well with the darker stain of the new pocket door. The vanity wall is completed with brushed gold hardware and a sleek modern light fixture, adding a touch of elegance.
Functional and Elegant Finishes
We also focused on adding practical storage solutions. We incorporated open stained shelving, giving the homeowners a place for display and essentials without cluttering the space. Every element in this project, from the tile to the warm metal finishes, was selected to create a modern yet timeless look. This bathroom remodel in Runnemede, NJ successfully blends practicality with luxury, giving the homeowner the spa-like retreat she desired.
If you are inspired by this Runnemede project and are considering a bathroom remodel of your own in the South Jersey area, we invite you to contact our team at Ideal Remodeling. Let’s discuss your ideas and start planning your perfect space today.
Photos of Bathroom Remodel in Runnemede, NJ


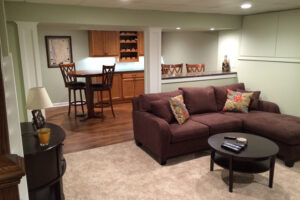
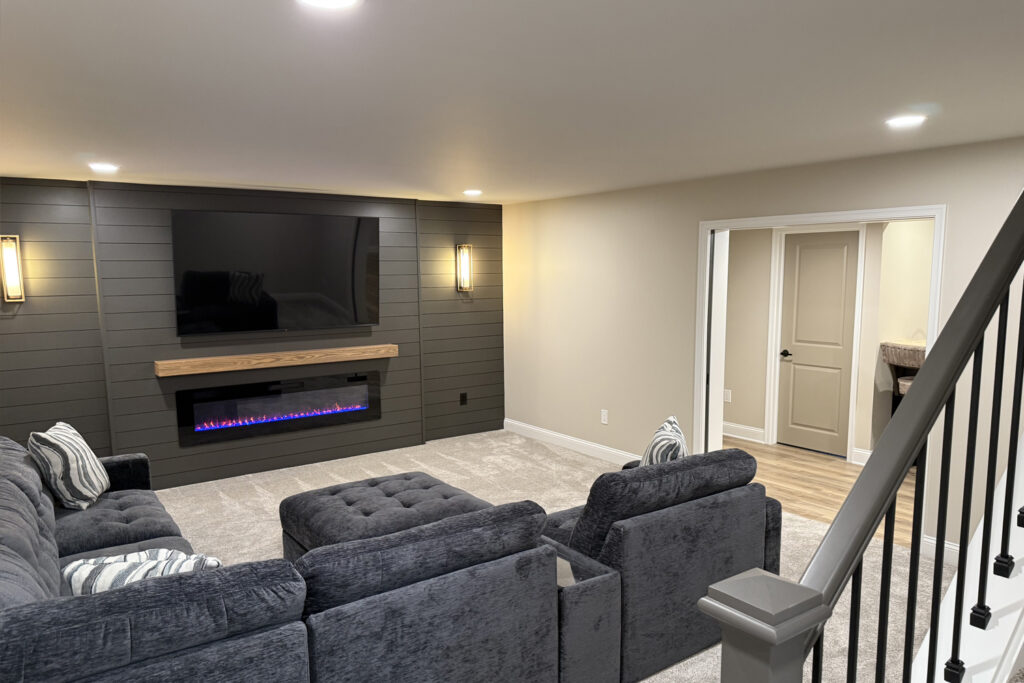
Sewell Finished Basement Remodeling Project
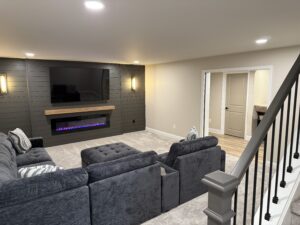
Ideal Remodeling recently completed a full basement remodel in Sewell, New Jersey, transforming an underutilized space into a functional, stylish, and entertaining area the whole family can enjoy. At roughly 1,100 square feet, this basement includes: a versatile bonus room that can serve as a home gym or office, a full bathroom with sink, toilet and a stand-up shower, and a beautifully designed 5-seat bar and living area. This basement remodel in Sewell demonstrates how a significant amount of living space can be added below grade.
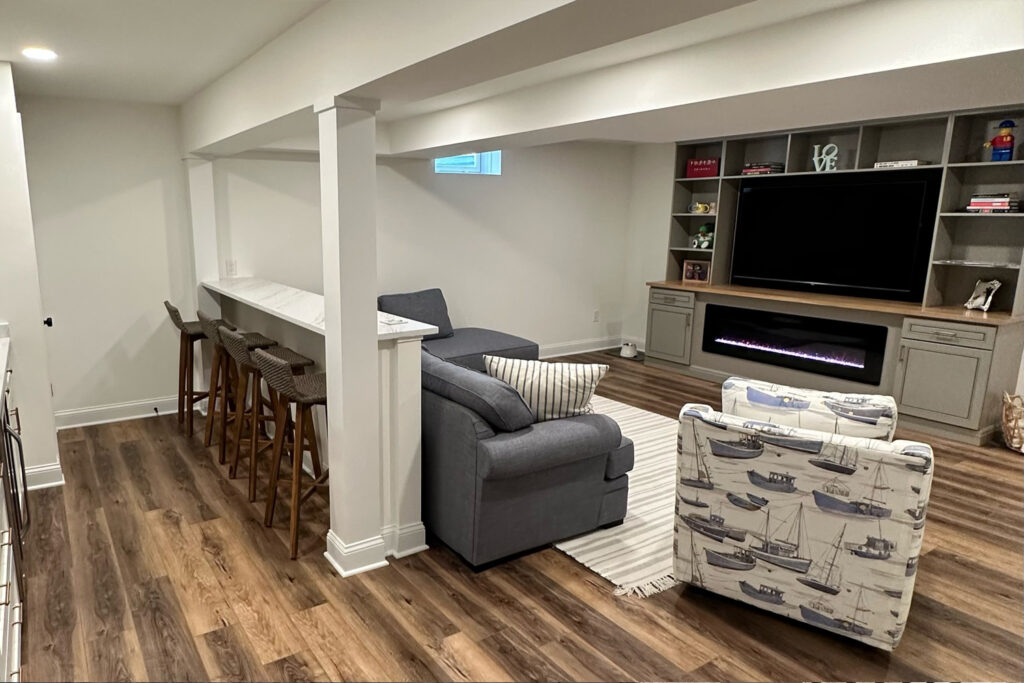
Features of basement remodel in Sewell, New Jersey
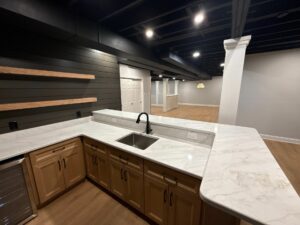
Bar and Entertainment Area
The bar features dark espresso cabinetry paired with quartz countertops and a mirror-beveled subway tile backsplash, creating a sophisticated, masculine look. LVP flooring ensures durability while keeping the space polished and easy to maintain.
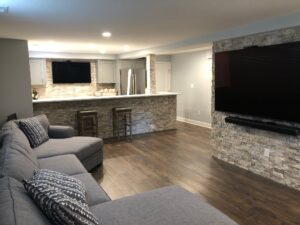
Living Room
The living area centers around a striking shiplap accent wall painted in Sherwin-Williams Urbane Bronze, complete with an electric fireplace and wall sconce lighting. Carpeted flooring adds warmth and comfort, perfect for lounging or watching a movie. Double pocket doors with soft-close and soft-open mechanisms separate the bar from the living space, offering flexibility and allowing the owners to use it a 2 separate spaces when they want to.
Bathroom and Functional Upgrades
The new full bathroom features a stand-up shower, modern fixtures, and updated plumbing and electrical wiring. All inspected and code compliant that was performed by licensed professionals.
Overall Design
The basement’s color palette combines Sherwin-Williams Modern Gray walls with rich, dark accents for a balanced look that’s both cozy and party-ready. Then a last minute decision was made to paint the 2 panel doors in Sherwin-Williams Taupe Tone. Every detail was carefully chosen to maximize comfort.
This remodel demonstrates how a basement can be transformed into a multi-functional retreat without the expense of a full home addition—perfect for entertaining, relaxing, and everyday living.
Photos of basement remodel in Sewell, New Jersey